
Make a Year-in-Review Book. Fast.
If you are like most people, the idea of creating a year-in-review photo book is probably one of the most daunting, God-awful tasks on your to-do list. And yet, once it's done and you have that book in your hands, it is also one of the most rewarding things you can do with your photos. So how do you get from Point A to Point B easily, quickly, and efficiently?
We live in a world where instant gratification means everything, so everything is fast, fast, fast. When something feels overwhelming, I like to break it down into smaller pieces and figure out exactly what I'm dealing with. That's what we're going to do with your year-in-review photo book. And, because I'm a numbers girl, formulas and numbers is how I’m going to break this down for you.
First: The numbers.
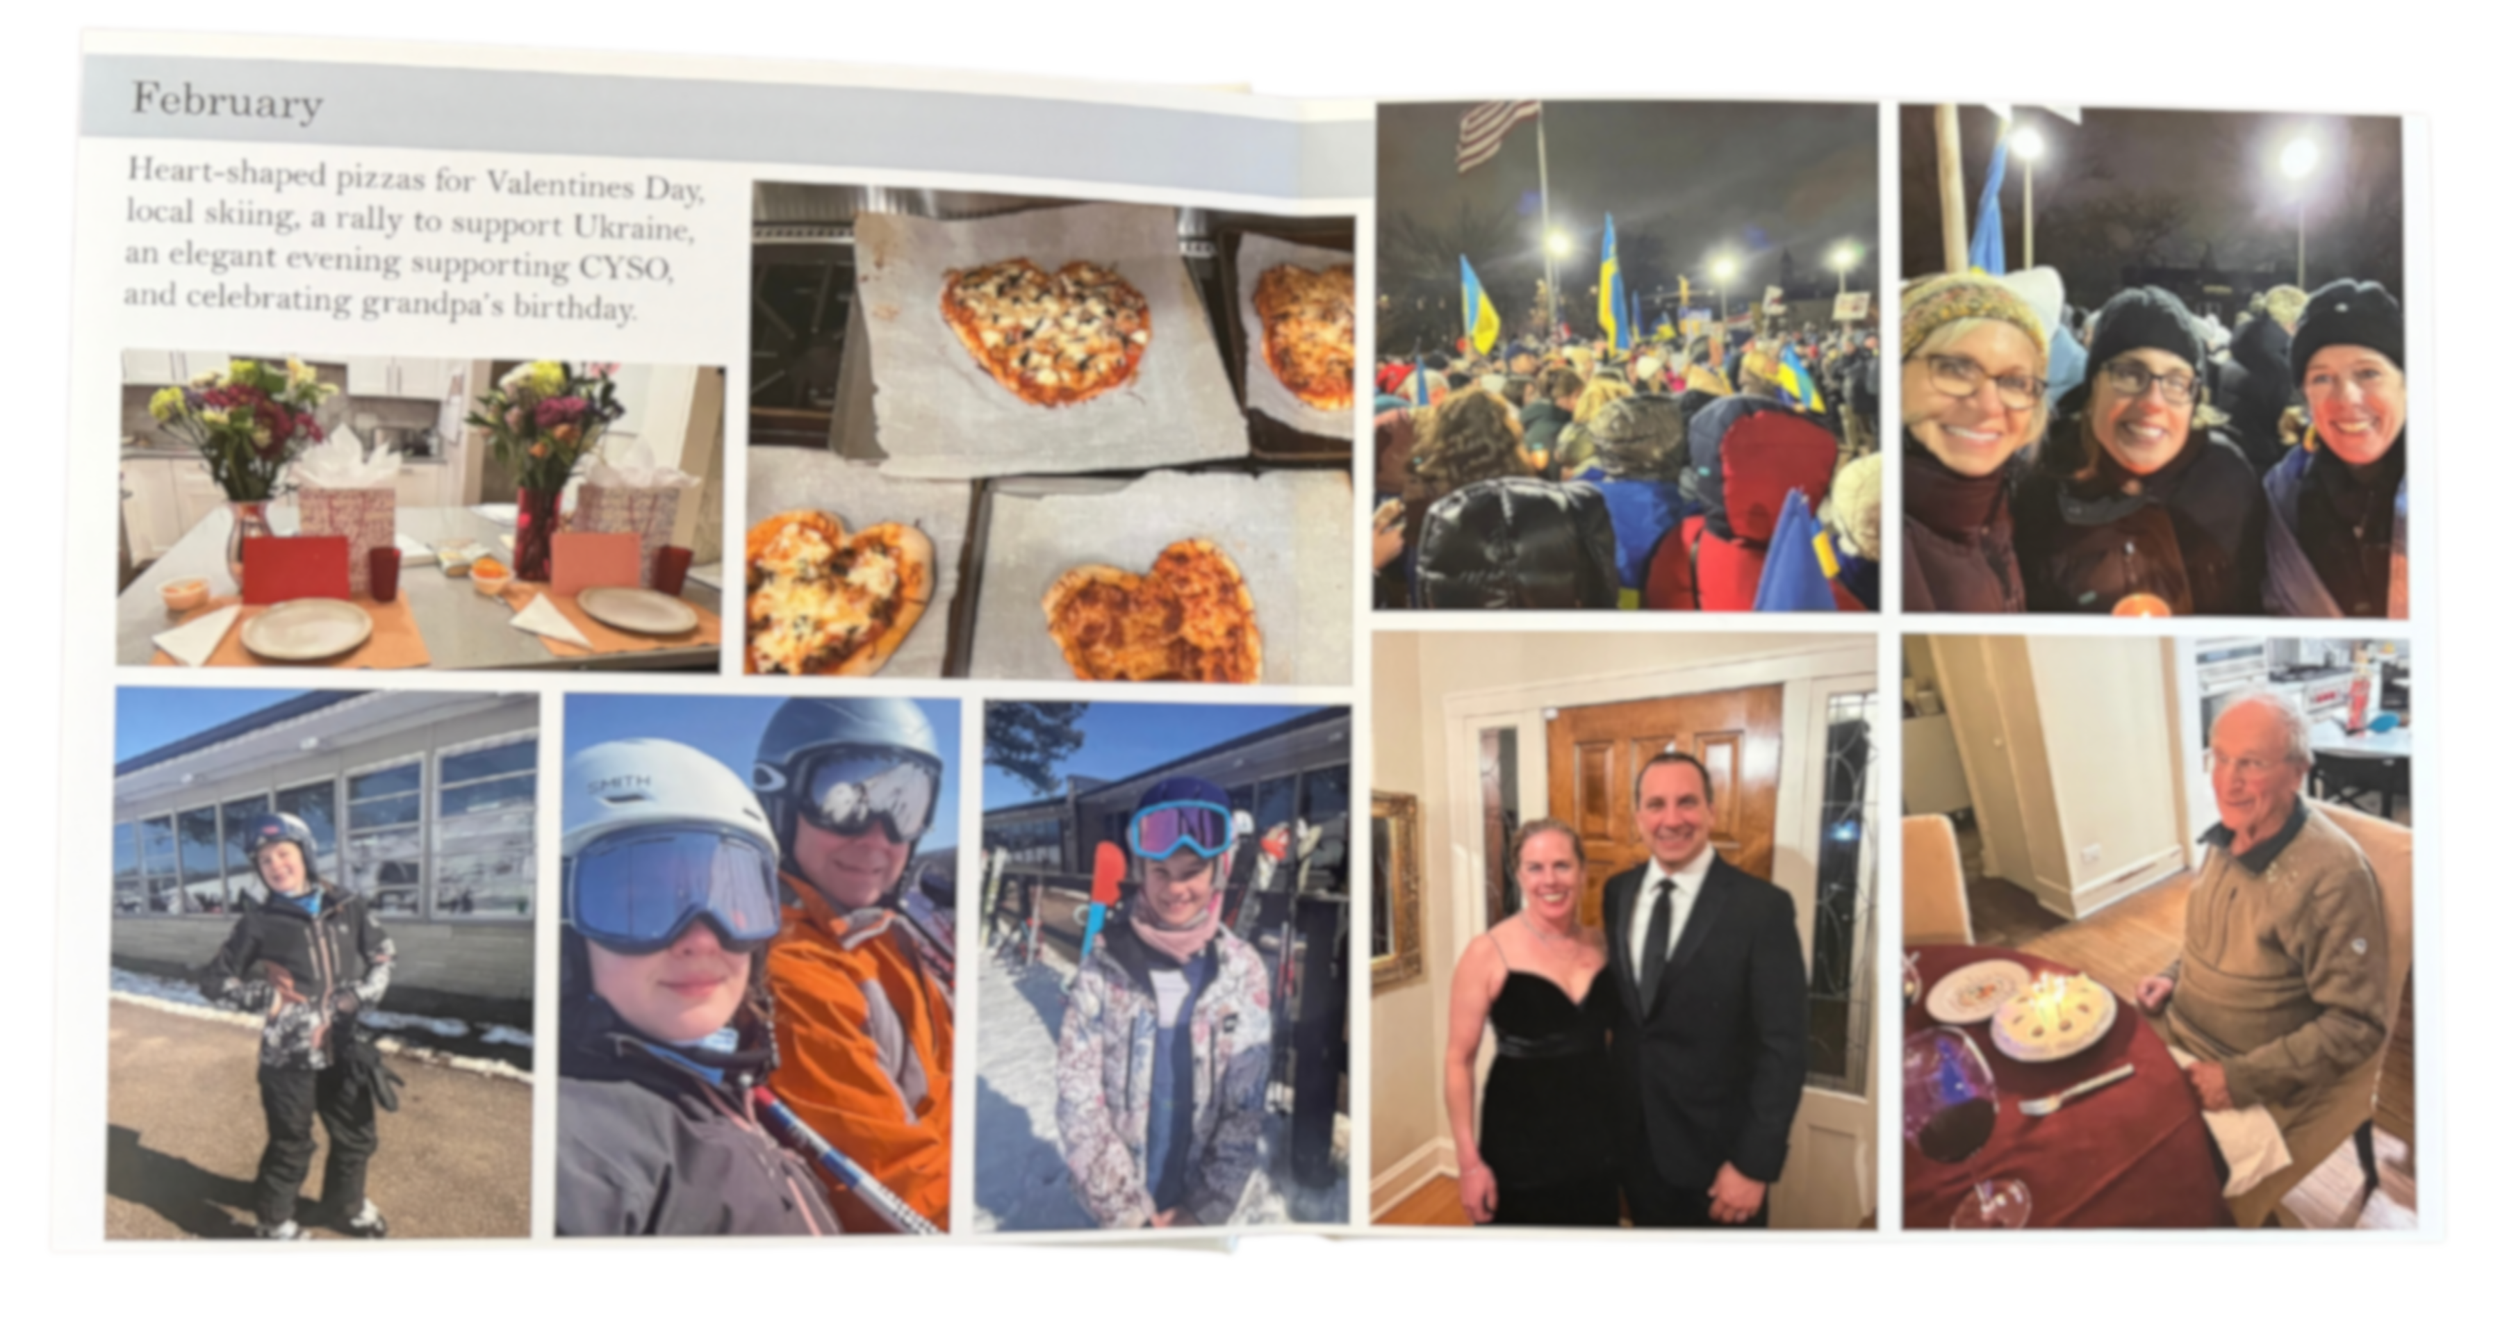
There are 12 months in a year. If you dedicate two spreads to each month, that's four pages per month. A spread is what you see when you open up a book: the page on the left and the page on the right make up a spread.
So, 12 months multiplied by four pages gives us a 48-page photo book. That's the starting point.
Now let's figure out how many photos we're talking about.
I average about four photos per page in the books I design. Sometimes there's a really amazing photo that deserves its own page. Other times, I might put five or six photos on a page. But when I look at the book as a whole, I average about four photos per page.
If we're giving each month four pages, that means we're looking at about 16 photos per month. Multiply 16 photos by 12 months, and we're at 192 photos for the entire book.
Okay, 192 photos might sound like a lot. But it really isn't, especially when you remember that we're not choosing those 192 photos all at once.
Also, keep in mind, some months you may have taken a ton of pictures because you went on vacation, had a family event, or celebrated a special occasion. Other months, maybe nothing much happened. And that's okay. We're using this as a guideline, not a rule that every single month has to follow.
Next: Let’s pick the photos.
This is where I think people get stuck. We look at our photo library and think, "Oh boy, I have to go through an entire year's worth of photos!"
12 months × 4 photos per month = 48. A 48 page photo book is VERY doable.
Don't think about the entire year. Think about just January. Go in there and find the best 16 photos from that month. Heart them, make them favorites, put them in an album, or designate them however you want. The important thing is that you give yourself a limit and then stop.
Tomorrow, or the next day, you come back and do February. And the next day, pick March, then April, and so on. In 12 days, you've selected the photos for your entire year-in-review book.
For me, selecting the photos is the part of any of my photo book projects that feels like the biggest burden because we think we have to go through everything all at once. But you don't. You just have to look at one month at a time. If we're using the two-spread-per-month mentality, you're capping your photos at 16 for each month, and that makes the decision-making much easier. And once it’s done, the fun begins!
Now the fun begins.
Choose your favorite photo book company and import your photos. There are a ton of fine companies out there (and some really amazing ones). But I am not here to endorse one over another. Shutterfly is probably one of the most well-known. Mpix is a good option if you want to design your own spreads, while Mixbook has pre-designed templates, stickers, colors, and other design elements if that's more your style. There is really no shortage of photo book companies. And, for this project, I definitely do not want you to overthink it. This project is about using a simple formula and just getting it done.
So we're going to take those photos you just selected, whether that's 96 or 192 photos or something in between and we're going to get them into your book.
Keep each month together.
Once you're working in your photo book software, open up your first spread. You'll see the two pages facing each other, and that's where you’ll place January.
If you selected 16 photos, put eight on the first spread and eight on the second. Then move on to February and drop those photos in, flip the page, and move on to March. You just keep going through the year, systematically dropping your photos into the template you've chosen.
This is actually a really awesome place to be because you've already done the thinking. You know exactly how many photos you're working with, you know which month they belong to, and you know how much space you've given yourself.
So, if it's important to you that your spreads stay together, I'd recommend designing it yourself. But here's the good news: you've already made it easy for yourself. You haven't selected 75 photos for January. You've selected 16. You haven't dumped 1,000 photos into the book and told yourself you'll figure it out later. You've already made the decisions. Now you're just putting them where they belong.
This is easy. And this is quick.
Sidenote:
There are also some photo book companies that have a "create it for me" button where you can essentially hand over your photos and let them design the book. That can be tempting, but I do want you to be a little careful.
Because you were so selective about how you picked your photos and you planned that each month would get two spreads, if you use an automatic design tool, there's a chance it won't follow your plan. It may move photos around or combine months in ways you don't want. So, just be mindful if you do decide to click on the ‘do it for me’ button.
Don't make this harder than it needs to be.
I know creating a year-in-review book is no small undertaking. I get that. But I also know how good it feels when you have that finished book in your hands, and I want you to have it. The point is to give yourself a system that keeps this project from becoming overwhelming. Break it down by the numbers, choose a reasonable number of photos, and then work through the year one month at a time.
Think about what that looks like: up to 16 photos per month, dropped into your favorite photo book company, with two spreads max for each month. That's 48 pages and you're done.
If you want to hear me talk through this concept, I made a short YouTube video that breaks down the numbers and explains how I approach a year-in-review book.
Watch the video here, and when you finish your book, come back to YouTube and tell me, "I did it!" I really do want to hear about it. Creating a year-in-review photo book is no small undertaking, and getting that finished book onto your shelf is absolutely worth celebrating.
So, for now, start with just picking your 16 photos. Start with January. Then walk away. Come back tomorrow or the next day and do February. Keep going, one month at a time, until you've made your way picking photos for the year.
And when you finish your book, come back to YouTube and tell me, "I did it!" I really do want to hear about your win! Getting that finished book onto your shelf is absolutely worth celebrating.
Want more photo tips? Sign up for our mailing list for photo book ideas, organizing tips, and practical ways to get more from your photos.